May 14, 2011

May 10, 2011

May 9, 2011

May 3, 2011
Reaching the summit- Part 2

My blue shawl is almost off the needles and I tell you, I’ll never knit one of those ever in my life. I got excited learning the technique in the beginning but then, excitement became boredom, boredom became irritation and irritation progressed to something very wrong(#@*&$@!!)and yes, very susceptible to censorship.
Making those holes and the repetitious pattern somehow did not appeal to me as I initially thought it would. What I need after this is finding a very small lace pattern and experiment with it. I want to put to the test if it is really true lace knitting is magic and a knowledgeable knitter (I am afraid it is not my case yet) will eventually step it up a notch and adventure into the isles of lace land.
Huummm let’s see about that…
In the meantime I made this crochet layout and the pictures I took from this book here, it is in Japanese and I am planning to buy some day.
Apr 26, 2011
Free Form Knitting
Last week I went to visit a friend who is a new mother and she told me how chaotic her life became after her first child was born.
Yeap, her house is up-side-down, nothing in its place anymore like it used to be Toys, pacifiers and bottles and strollers all over the place and that made me think how structured and orderly I like my life to be and most of this approach to life extends to my knitting Actually I believe I like knitting so much in part because I follow the pattern and everything is pretty much under control.
Free form knitting… How in the world I am going to be able to understand a pattern without the pattern itself. I admire every single knitter designer and their creativity but after looking up on the net for blankets, I started to think about expanding and upgrading my knitting to Free Form Knitting. I wish to learn how to knit abstract pieces, I want to be able to see one piece and know how to knit it without a pattern.
In the meantime I just dream of one day being able to knit This… Isn’t it fabulous?
Apr 23, 2011

Apr 21, 2011

Apr 3, 2011

Mar 28, 2011

Mar 27, 2011
kureopatora scarf- Part 2
Kureopatora - Part 2
Row 1: Knit in the front, then purl in the back of the first stitch, SSK. Turn work over so the next row heads back in the other direction. Note that this first row is only 3 stitches long.
Row 2 and all subsequent even numbered rows: Work P1, K1 ribbing as established.
Row 3: Purl in the front, then knit in the back of the first stitch, P1, SSK. Note that from now on this row-ending SSK will be composed of one stitch worked on the previous row, plus one stitch from the dormant stitches on the left hand needle. Turn work over so the next row heads back in the other direction. You now have 4 stitches in the row.
Row 5: Knit in the front, then purl in the back of the first stitch, K1, P1, SSK. Turn work. You now have 5 stitches in the row.
Row 7: Purl in the front, then knit in the back of the first stitch, P1, K1, P1, SSK. Turn work. You will now have 6 stitches in the row.
Continue to work in the manner of rows 5-8, adding one stitch at the edge of each right-side row in the established rib pattern until you have incorporated all of the dormant stitches on the left hand needle. You will again have 30 stitches on the needle. At this point your segment is done. To do the next one, flip the work over (the and begin again from Row 1 of the Entrelac section). Continue adding entire trumpet shaped sections until your scarf is of sufficient length.
It looks like this after the two segments are established:
Mar 26, 2011
kureopatora scarf- Part 1
Materials
*project: kureopatora snake scarf
designer: Kim Brody Salazar
* US #6 needles
* 1 skein - Swiss Mohair (universal yarn)- color 2503 - Ram
* I cone - Ramie Cork yarn (A-166-Habu) color 13
As for working method, this scarf is done in a pretty standard Entrelac edge column technique - think Entrelac project reduced to just the right and left most columns, without the basket weave effect sections between.
Row 1: Cast on 1 stitch, knit in the front, then purl in the back of this stitch [2 stitches on needle]
Row 2: Knit in the front, then purl in the back of the first stitch, K1 [3 st on needle]
Row 3: Purl in the front, then knit in the back of the first stitch, P1, K1 [4 stitches on needle]
Row 4: Purl in the front, then knit in the back of the first stitch, P1, K1, P1 [5 stitches on needle]
Row 5: Knit in the front, then purl in the back of the first stitch, finish row in established K1, P1 ribbing [6 st on needle]
Row 6: Knit in the front, then purl in the back of the first stitch, finish row in established K1, P1 ribbing [7 st on needle]
Row 7: Purl in the front, then knit in the back of the first stitch, finish row in established P1, K1 ribbing [8 st on needle]
Row 8: Purl in the front, then knit in the back of the first stitch, finish row in established P1, K1 ribbing [9 st on needle]
Continue rows 5-8, adding one stitch in each row but doing it to maintain the K1, P1 rib pattern. Keep doing this until you have 30 stitches on your needle.
This is how it looks like after 30 rows:
 Video copied from http://www.youtube.com/user/lunaknits
*project: kureopatora snake scarf
designer: Kim Brody Salazar
* US #6 needles
* 1 skein - Swiss Mohair (universal yarn)- color 2503 - Ram
* I cone - Ramie Cork yarn (A-166-Habu) color 13
As for working method, this scarf is done in a pretty standard Entrelac edge column technique - think Entrelac project reduced to just the right and left most columns, without the basket weave effect sections between.
Row 1: Cast on 1 stitch, knit in the front, then purl in the back of this stitch [2 stitches on needle]
Row 2: Knit in the front, then purl in the back of the first stitch, K1 [3 st on needle]
Row 3: Purl in the front, then knit in the back of the first stitch, P1, K1 [4 stitches on needle]
Row 4: Purl in the front, then knit in the back of the first stitch, P1, K1, P1 [5 stitches on needle]
Row 5: Knit in the front, then purl in the back of the first stitch, finish row in established K1, P1 ribbing [6 st on needle]
Row 6: Knit in the front, then purl in the back of the first stitch, finish row in established K1, P1 ribbing [7 st on needle]
Row 7: Purl in the front, then knit in the back of the first stitch, finish row in established P1, K1 ribbing [8 st on needle]
Row 8: Purl in the front, then knit in the back of the first stitch, finish row in established P1, K1 ribbing [9 st on needle]
Continue rows 5-8, adding one stitch in each row but doing it to maintain the K1, P1 rib pattern. Keep doing this until you have 30 stitches on your needle.
This is how it looks like after 30 rows:
Video copied from http://www.youtube.com/user/lunaknitsMar 23, 2011
23

Today is my brother's birthday!! He's turning 63 and he's better take a deep breath to blow up 63 candles. have fun!!! your sis, Gi
Mar 19, 2011

Mar 13, 2011

Mar 12, 2011

Mar 7, 2011

Feb 27, 2011
Reaching the summit

The summit shawl has been in the works for a couple of months now. I have decided to make it really long. Like I said before, I stop from time to time to make something else. This pattern is really tedious! Besides I am adding 15 more columns; 25 wave-sets total. I prefer it to be the size of my wingspan or longer).
I learned how to twist the stitch and it really helps to anchor the yarn so the gap looks more defined. .
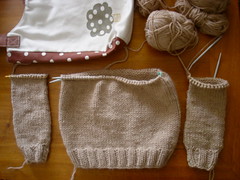
In the meantime, I finished up the fussy white scarf. As I had a lot of yarn leftover, I knitted a hat and pair of mittens. The entire set came out really nice.
Picture of my next project

Feb 12, 2011
Tawashi

For the longest time I’ve been contemplating the idea of learning crochet. I find it to be very intricate, specially reading the patterns and charts. They are kinda of undecipherable for me.( I have a plan B though, just in case.)
Then, surfing the net, I found Ana Paula and she posted a couple of step-by-step tutorials that has motivated me to get started on a beginner small project (making a granny square)
A couple days ago, I was searching some Japanese sites and I bumped into a scrubbie named Tawashi. They really caught my eyes and I even found a tutorial video here.
I loved these ones and there’s even an anti-bacterial yarn for sale at Etsy. They are supposed to be really scritchy-scratchy and they might be perfect for scrubbing my dishes before going into the dishwasher!
Look these ones .
Feb 7, 2011
Valentine's
We are all a little weird and life's a little weird, and when we find someone whose weirdness is compatible with ours, we join up with them and fall in mutual weirdness and call it love.
Unknown author

Unknown author
Subscribe to:
Posts (Atom)